Friday, March 29, 2013

Vintage and Exotic Car Restoration Bay Area - Behind the Scenes of the LaFerrari’s Launch - FZ Restoration Livermore

Video: Behind the Scenes of the LaFerrari's Launch


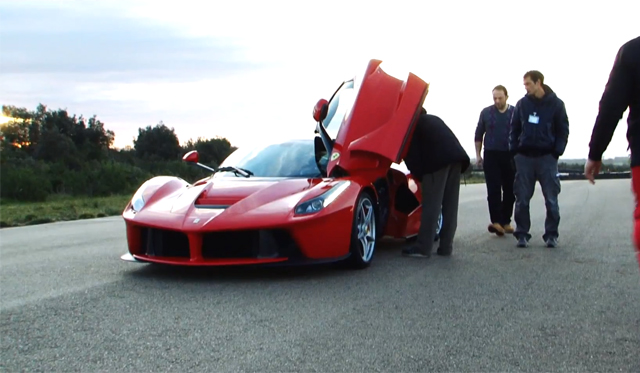
Ferrari has just released a video showcasing the work which went into shooting and filming the debut still shots and Driving images of its brand new halo car, the LaFerrari.

As the following video showcases, Ferrari managed to gain access to a private race track completely away from all spying eyes and swiftly set about filming the very first driving scenes of the LaFerrari!


Included in the video are some very nice accelerations from the V12 powered LaFerrari!


Wednesday, March 27, 2013

Vintage and Exotic Car Restoration - BMW wants world drifting record back in US - FZ Restoration Livermore


BMW Drift Record


BMW just can't stand the thought of the world record for the longest drift winding up in the hands of someone else. The German automaker is set to take a crack at setting a new record by blowing the old one straight out of the water. A driver in China holds the current title after kicking a car sideways for a full 3.6 miles. Now, on May 11, BMW Performance Driving Instructor Johan Schwartz will attempt to pitch a BMW M5 sideways for some 40 miles as part of a stunt to raise funds for the BMW Pro-Am Charity.

We've had the distinct pleasure of riding with the instructors at the BMW facility in South Carolina, and we can tell you that if anyone can keep an M5 at full tilt for 40 miles, it's these guys. BMW has released a teaser video to drum up attention for the stunt. You can catch it below.


source: autoblog
by Zach Bowman
BMW via YouTube


http://www.rzrestoration.com

Monday, March 25, 2013

Vintage and Exotic Car Restoration Livermore - McLaren unveils the most eagerly anticipated car of the year, the P1 supercar - FZ Restoration Livermore


McLaren wanted to develop a car that could be driven to the circuit track and raced on it. Here it is, the P1 (Picture: File)


It’s one of the most eagerly anticipated supercars of the year. No, of the decade. Perhaps even two decades. The car in question is the McLaren P1 and, to understand its significance, a brief history lesson is required.

The P1 is the spiritual successor to the McLaren F1, first launched 21 years ago. It’s a legend among petrolheads as a past holder of the ‘world’s fastest production car’, set at 243mph in 1998. More recently, the F1 hit the headlines after Rowan Atkinson parked his in a hedge. The repair bill was an eye-watering £900,000, worth paying because only 106 were ever made and, when they do change hands, it’s for much more than that.

And so comes the P1, a 903bhp monster that blends a 3.8-litre twin-turbo V8 petrol engine with a state-of-the-art electric motor to create a hybrid powertrain. Designed to rocket the car from a 0-62mph in less than three seconds, it features many technologies from McLaren’s other line of business, Formula One. They include a drag reduction system – or DRS to armchair Grand Prix fans – which opens and closes a vent in the rear wing to make the car more aerodynamic.

This time, more than 106 will be made but, even so, not enough to keep all the world’s uber-rich collectors happy. Just 375 hand-built examples will leave McLaren’s factory in Woking, with each vehicle costing £866,000.

McLaren’s goal was to create the best driver’s car in the world, whether on road or track. Chief design engineer Dan Parry-Williams says: ‘The P1 celebrates aerodynamics; great packaging and light weight, and is all about innovative technology. At the very beginning, we sought to develop a car that you could drive to a circuit, then press a button and race it.’

The F1 was a gas-guzzler powered by a 6.1-litre V12 engine but technology has moved on dramatically since 1992 and the P1 is actually a surprisingly clean car. CO2 output is below 200g/km, less than many large family cars, and provides around six miles of emissions-free driving. The electric motor is mounted directly on to the engine and drive is channelled through the dual-clutch seven-speed gearbox to the rear wheels. Spare energy is stored in a battery charged via the engine, though the P1 is also equipped with a plug-in cable that takes the cell to 100 per cent capacity in two hours.

Shaving the pounds wherever possible has been a priority to maximize performance. Formula One-grade carbon fiber has been used extensively, from the chassis and body panels to finishing the two-seater cabin. Switchgear has been kept to a minimum for the same reason and the top layer of resin has been removed from the dashboard. There’s no interior sound-deadening and while carpet is offered as an option, even then it’s fitted with a special lightweight backing.

News of the P1’s top speed – electronically limited to 218mph – inevitably leads to one question: will the car make a speed record attempt? Predictably, McLaren has avoided a clear-cut answer. The current benchmark, set by the Bugatti Veyron Super Sport, is 258mph, but it’s hard to believe the company doesn’t want the P1 to be No.1.
source: http://metro.co.uk/2013/03/22/mclaren-unveils-the-most-eagerly-anticipated-car-of-the-year-the-p1-supercar-3554589/
mcclaren


http://www.fzrestoration.com

Friday, March 22, 2013

Vintage and Exotic Car Restoration Bay Area - Watch this Lamborghini Gallardo get hooned like a WRC car - FZ Restoration Livermore


Driving your million-dollar supercar or ultra-lux limousine carefully and pridefully on to the well-manicured lawns of a fancy concurs d'elegance is what your old man did, square. Driving your exotic through mud and filth, with fast sideways bits and loads of counter steering is what all the hip kids are up to these days.

Having already experienced the puerile joys of seeing a Rolls-Royce turf a lawn and a Ferrari Enzo slide around the farm, we can now enjoy this Lamborghini Gallardo in the mud and ruts. The video below shows about exactly what you'd expect from WRC-themed title, except for lacking in big air and, you know, really good, fast driving. Still, there's mud. Check it out below.


source: autoblog
by seyth Miersma

http://www.fzrestoration.com

Wednesday, March 20, 2013

Vintage and Exotic Car Restoration - Video: Ferrari 458 Italia Crashes in Brazil - FZ Restoration Livermore


Video: Ferrari 458 Italia Crashes in Brazil Injuring Three
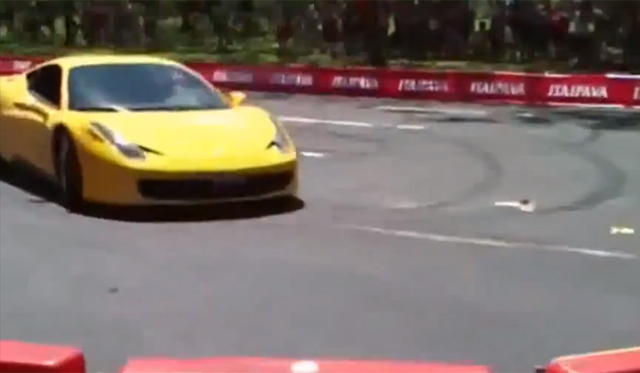
An unnamed Ferrari driver has been arrested after losing control of his Ferrari 458 Italia at a recent racing event in Brazil.
The owner somehow lost control of the car when approaching a turn and barrelled into the crowd where three spectators were injured, two of which were admitted to hospital.
A spectator at the event Cida Alves said, “We were behind the guard rail and he (the driver of the Ferrari yellow) lost control in the curve


source: http://www.gtspirit.com/2013/03/14/video-ferrari-448-italia-crashes-in-brazil-injuring-three/

http://www.fzrestoration.com

Monday, March 18, 2013

Vintage and Exotic Car Restoration - Twin-turbo, 700-hp Ferrari 458 crashed into swamp after top-speed run- FZ Restoration Livermore


The Amelia Island classic car show in Florida last weekend spawned a number of sideline events, including a speed festival at the local airport for exotics and tuned cars to take a few high-speed runs. This was the unfortunate end to one: a Ferrari 458 enhanced with twin turbos to about 700 hp running out of tarmac before it ran out of speed. It's not how the owner imagined his second day with the keys would end.
As discussed on Ferrari Chat and other forums, the car was a project of top tuning shop Underground Racing, which had once belonged to IndyCar driver Graham Rahal; the driver, who was reportedly a friend of the owner, was not injured in the runoff, which happened on his third attempt. Doing a full-throttle run in any supercar requires a significant length of road — those with a memory for algebra class might recall that a vehicle's stopping distance grows in proportion to the square of velocity — and the private airstrip where the event was held was just 0.56 miles long.
Modern restoration shops can work near miracles, and given the value of such exotics there are a few craftsmen that might see this 458 as an opportunity to showcase their skills. (If a Ferrari Enzo that was driven into the ocean can be resurrected, anything can.) But doing so would likely cost as much as a new Ferrari 458, and how would America's hard-working reclamation engineers earn a living were it not for a steady parade of wrecked exotics to scalpel into eBay-able parts? I'd say this race was won by the automotive circle of life.
Photos: David Johnston/Ferrari Chat

source: Motoramic
by Justin Hyde


http://www.fzrestoration.com

Friday, March 15, 2013

Vintage and Auto Restoration - Removing old paint isn't sexy but it's the first step to a concours-quality restoration - FZ Restoration Livermore


Stripping Paint

When the topic of stripping old paint comes up, the word "laborious" quickly springs to mind. The fact is there's absolutely nothing sexy about removing old paint, but if you want your project car or truck to look new again, this less-than-pretty process is step one.

There are only a few ways to liberate metal from a veneer of paint--sanding, media blasting, scraping or chemical stripping. Which of those methods is best has sparked many, many debates, however.

Sanding or scraping, with or without the aid of paint stripper, is the easiest for the home restorer. But both methods are messy and time consuming. Media blasting is fast and wildly effective. However, it requires special equipment, makes a mess and can lead to distorted sheetmetal if not executed with the utmost caution, and some respect for the process.

Sending a car out to be dipped in a vat of paint-dissolving chemicals results in squeaky-clean metal--the perfect foundation for any restoration. However, the vehicle must be completely disassembled, then shipped to a facility where the work is done--and there isn't one in every town.

So which method is best? That's up to you, but it really depends on the condition of your car's finish as well as your budget.


Sanding and Scraping
Many experts agree that if a vehicle is sporting only a factory finish and that finish is largely intact, then it's best to scuff it with 220- to 400-grade paper followed by a sealer, primer and paint. Of course, any spots requiring bodywork will have to be stripped to bare metal first.

But let's say your car has a build up of paint that, layer for layer, would rival a character in a Dostoevsky novel. Well, in that case, there's serious stripping to be done.

If your intent is to tackle the job yourself and you have a good air compressor, a dual-action sander loaded with 80-grade paper is a formidable weapon against old paint. If you're doing an entire car, buy a roll of the self-adhering discs and change them frequently--grinding away with a plugged-up disc just wastes time and energy.

When wielding a DA, don't hold it in one spot and push down like you're trying to bore a hole through the paint. Instead, fan it out over a broad surface the way you would a buffer--this prevents heat from building up in one area, distorting the panel.

In some rare cases it might be possible to actually scrape paint off a panel with razor blades. While this produces no dust and won't heat up the metal, it is every bit as mind-numbingly tedious as it sounds. Often it's very meticulous types who take this approach, and it's commendable. But life is short, and just think how fast a DA would strip off that paint if a razor blade can lift it...


Media Blasting
It's a commonly held belief that sandblasting sheetmetal is a no-no. However, if the body panels are seriously rusted and large portions of the panels are going to be replaced, grains of sand or bits of metal slag propelled by 80-100 p.s.i. of compressed air can do wonders for digging deeply embedded rust out of pits and pockmarks. The keys are:

Use a gentle medium like DuPont's Starblast or even glass bead or silicon carbide media from TP Tools;

Keep the air pressure as low as possible without constantly clogging the tip (or wasting too much sand) and;

Most importantly, fan the spray out over a broad area, preventing the buildup of heat on any one panel. It's tempting to blast a small area down to bare metal, then move over six inches and repeat, but this is a surefire way to make your vehicle's panels as wavy as a North Atlantic winter. Instead, keep the tip in constant motion and imagine you are rinsing off the car with sand, the way you would rinse off dirt with a hose.

Soda blasting has become a popular method for removing paint, particularly from surfaces that would be destroyed by sand, like fiberglass. It's a very benign process, but it won't dig rust out badly of pitted metal.

If you have the space, it is possible to blast a car at home. A good shop air compressor might be able to keep up with a small hobbyist-grade sand blaster, but it won't be able to recover quickly enough to properly power a larger blaster. The truth is, small blasters like those sold at Sears or Harbor Freight are great for wheels and small parts, or spot blasting badly pitted portions of a panel, but for an entire chassis or body, you might want to consider renting a tow-behind compressor and a large blaster--or farming the job out altogether to someone with experience blasting sheetmetal.

If the glass is in the vehicle you'll need to protect it with cardboard or light plywood, duct taped in place--or better still, remove all glass panels. A couple of layers of duct tape works pretty well to protect items that you don't want blasted.

Once the panel has been blasted, sand it with 80- to 100-grade paper to knock down the roughness (you'll be amazed at how quickly it looks like new, smooth metal!) then prime quickly, as rust will start to form almost immediately.


Chemical Stripping
There are dozens of good chemical paint strippers on the market designed for automotive hobbyists and restorers to use at home. In fact, this is a great way to remove paint without risking damage to the car, though it takes considerable patience, which some people don't have, and time that professionals might not want to spare.

On a car with multiple layers of paint, chemical stripper will remove one layer at a time. Just apply it to the panel with a paintbrush, let it wrinkle the finish and scrape it off with a paint scraper. Work on small sections at a time, applying the stripper over and over until the body is bare. It's a good idea to put a tarp down to make cleanup easier, and the entire car should be washed with soap and water after using the stripper.

Without a doubt, the most thorough way to remove paint from a vehicle is to have the entire body dipped in a vat of dissolving chemicals; one company that's well known for this service is Redi Strip. The downside is that anything that isn't sheetmetal must be removed from the vehicle first, and if the stripped body isn't properly cleaned of the caustic chemical, it can remain in tight seams and small cavities and will harm the new paint.

Dale Lodor of Auto Restoration Depot in Wauchula, Florida, has been in the restoration business for the last 36 years, and has been stripping and derusting for the past five. He dips all of his own projects in his two-tank, total-immersion stripping system and handles stripping chores for a variety of professional restorers. Half of his business, however, comes from hobbyists and do-it-yourselfers.

"The good professional restoration shops and many amateurs go this route," Dale said. "You can see what you've got after the car has been dipped. It gets in every place and takes everything totally off it."

The two-tank process immerses a body first in a tank that degreases and loosens all of the paint. Then, with a heated pressure water wash, all paint, grease and scale is removed. The second tank is full of an alkaline electrolytic solution through which an electric DC current is passed. The body emerges shiny, with every pit and corner rust-free.

Stripping paint definitely isn't sexy, but with all of the options available there's no reason that a home restorer can't free a beautiful body from the fetters of failing paint--the first step in the making of a drop-dead gorgeous restoration.

source: http://www.hemmings.com/hcc/stories/2007/11/01/hmn_feature7.html
by Mike McNessor


http://www.fzrestoration.com
Wednesday, March 13, 2013

Vintage and Auto Restoration - Painting Tips - FZ Restoration Livermore


Autobody painting is, without question, the hardest, most labor-intensive element of restoring an old car or truck. It requires lots of preliminary preparation, such as cleaning, sanding and priming, extensive planning ahead regarding weather conditions and humidity, and a whole lot of hands-on experience if you want to achieve professional-quality results. Add in the fact that you can't hide your mistakes like you can when rebuilding mechanical systems, and painting becomes the one task that most home restorers want to avoid.

But if you really want to give it a try, you can achieve successful results with not a lot of experience. The key word here is want, because without a strong desire, you won't be able to overcome the many difficulties that the painting process presents. Of course, nothing surpasses having quality equipment, a well-equipped facility and lots and lots of experience. In fact, the more experience you have, the better the end result will be, but if you follow these few simple rules, you will be able to lay down a new paint finish, of which you will be proud to say, "I did it myself." And maybe even win a few car show awards too.

PRACTICE
Like everything else in life, practice makes perfect. However, many amateur restorers don't have the luxury of painting other cars before they attempt to paint the car they are restoring. So first, use some cheap enamel paint, or just a cupful of plain paint thinner, and practice spraying on either your garage wall or on a piece of sheetrock or plywood. Even an old hood, fender or door will allow you to see if you have the spray gun adjusted properly for the correct spray pattern, paint flow and air pressure.

READ
Weeks before your date with the spray gun, buy a book on autobody painting and read it thoroughly. And when you're finished reading it, read it again. Knowledge is power, and the more you know about the entire painting process, the more professional your results will be.

FOLLOW DIRECTIONS
As long as you follow the paint manufacturer's directions 100%, you will avoid problems cropping up during the application of the paint or after, when it dries. It's best to read the directions on the paint can two or three times before starting any mixing of chemicals.

FAN
Place a 30-inch-diameter fan in the nearest window to help draw the overspray and paint fumes outside and away from your work area. Even though you'll be wearing an OSHA-approved paint mask (this mask is a must if you are to avoid future health problems), the more paint fumes you can remove from your work area the better. And the less overspray in the air, the less paint dust will settle on, and into, the paint while it's drying.

WEATHER
Paint is very sensitive to weather conditions. Always spray when the temperature inside your garage is above 60 degrees and the humidity level is low. Never paint when it's raining or when there's excessive humidity in the air, especially when using metallic paints, as moisture can get trapped under the paint film and cause the finish to get cloudy. Excessive moisture can also cause paint to lift not too long after it's applied.

GROUNDING
Although you can't see it, your car is one big magnet attracting every dust particle floating in the air to its steel body. But if you attach a steel chain to its frame and allow it to settle onto the floor, it grounds the car and helps eliminate static electricity, thus lessening the amount of dust settling onto the body.

VACUUM THE FLOOR
A day or two before you start painting, give your garage floor a comprehensive sweeping followed by a thorough vacuuming. Just don't do this the day you plan to paint, as the dust thrown into the air during the cleaning process takes hours to settle down onto the floor, and you surely don't want any dust particles to settle instead onto your freshly applied paint.

WETTING THE FLOOR
In order to keep the fine dust particles on the floor from rising up into the air while you walk around your car dragging the air hose, a light coating of water will help keep all those dust particles at bay. But whatever you do, do not soak the floor with an excessive amount of water; there are several reasons for this. First and foremost is that while the water evaporates into the air it will trap itself under the paint and cause the paint to soon lift; it will get onto the air hose and possibly onto the freshly applied paint; and it may cause you to slip and hurt yourself.

CLOTHING
Do not wear any type of clothing with fibers (such as cotton, wool or flannel) as they will detach themselves from your shirt or pants, float in the air and possibly settle onto the paint. Wear either nylon pants and a windbreaker-type jacket or buy yourself one of those disposable paper painter's suits. And wear a lint-free hat too, to avoid any loose hairs falling onto the paint.

TIME
Most importantly, don't rush. Allow yourself plenty of time, as it takes many, many hours to complete the entire painting process. Start early in the day, and plan your spraying on a day that you don't have to be anywhere else, as it takes longer to paint a car than you may think.

RELAX
Remember, old car restoration is supposed to be fun. So take a deep breath before starting, and try to relax. Sure, you can mess things up and waste a lot of expensive paint in the process, but you can always wait until the paint dries, sand the surface smooth, and spray the car again. Painting, like everything else, is a learning process, and you'll grasp the skill of painting a whole lot quicker if you're not so tense.

PRE-HEATING
A trick that some painters who work in cold climates employ is that of heating the paint right before spraying. Since paint fumes are highly flammable, do not use a heat source that has an open flame. Either use an electric warming tray to heat the paint can or submerge the paint can about three-quarters the way up to its lid in a large pot of very warm water. Don't cook or overheat the paint. The whole point of this exercise is to warm the paint just enough so it flows out better when it's applied, and thus reduces the dreaded orange-peel effect when it dries. This is necessary only if the air in your garage and the surface to be painted are on the cold side.

WAITING
As soon as you are finished spraying the entire body, get out of the garage and let the paint dry for several hours as recommended by the paint manufacturer. The more walking you do in the garage, the more dust you will throw into the air, and that means more dust will settle onto the paint. Just make sure your air hose extends outside the garage, or the painting area, as you still need to clean your spray gun before the paint inside it hardens and ruins it.
source: http://www.hemmings.com/hmn/stories/2005/07/01/hmn_feature6.html
by Richard Lentinello

http://www.fzrestoration.com

Monday, March 11, 2013

Vintage and Auto Restoration - Paint - Restoring Radiance - FZ Restoration Livermore


Restoring Radiance


With so many different paint types available today, choosing the right kind of paint to refinish your old car or truck can be one of the most difficult decisions facing car owners. Do you choose the type of paint that is correct for your era-built car, or do you upgrade and go with a more durable urethane for a longer lasting finish? Choosing the correct paint type will not only affect the cost of the refinishing process, but it can have a long-term effect on your car's value.

The varnishes that originally coated the earliest collector cars were direct descendants of furniture finishes used on horse-drawn wagons. While they could be applied with spray-gun technology developed in the 1800s, they required extensive hand finishing to develop lasting polish and regular maintenance to hold up for more than a year or two. A more modern lacquer finish was introduced in the 1920s that offered vastly improved drying times and, with much hand rubbing, a beautiful finish. These were single-stage systems, in that the paint was also the outer coating and carried both pigment and elements needed for a shine.

Change in this arena has generally been glacial, with new technologies emerging over the course of decades. Today, almost all new vehicles are refinished with a non-glossing urethane basecoat followed by a catalyzed urethane clearcoat-these are the common multi-stage "2K" systems. Over the last 20 years or so, these complete "finish systems" from a number of manufacturers have become the generally accepted way to refinish a car.

For those owners seeking a factory-correct restoration, these modern multi-stage urethanes are incorrect for nearly all collector cars. Compared to the old lacquers and enamels, urethanes are much too shiny-almost plastic in appearance due to the clearcoat-and don't have the same depth of finish that a lacquer finish has. They are also very dangerous for the average home hobbyist to use because they contain isocyanides; unless a paint mask with a fresh-air feed is used, the isocyanides-contained overspray will harden in your lungs and kill you. However, if you aren't interested in showing your old Mercury or Packard on the national level, and plan on having a professional paint your car instead, then modern urethanes are the way to go as they are far more durable than lacquer and acrylic enamel, hold up better to the acid rain and the sun's ultraviolet rays, and require less maintenance. But remember, a show judge will know the difference between this modern coating and something correct for the era.

Fortunately for the enthusiast, single-stage acrylic enamel and lacquers are still widely available. They require a little more manual labor than high-tech finishes (especially lacquer which needs to be color-sanded and buffed to achieve a shine), but that labor can produce a truly beautiful and authentic finish that can be achieved right in your very own garage. Acrylic enamel is often combined with a catalyst (also called hardener or activator), which makes the paint quite toxic. Without the hardener added, acrylic enamel will take longer to cure and the final finish will not be quite as hard, but you can still achieve excellent results.

If you are going for a truly authentic finish on a 1950s or older car, nitrocellulose lacquer is the required paint; yes, it's still available from a few specialty shops. You can make a lacquered body look terrific, but you'll spend an awful lot of time sanding and polishing to obtain an illustrious finish. Synthetic enamel used on Depression-era cars (and by Earl Scheib) is also still available.

Whether you decide to paint your car yourself or have it done professionally, it's not going to be cheap. Paints have increased tremendously in recent months due to rising petroleum costs and stiffer environmental regulations, which are forcing the manufacturers to constantly revise their paint formulas to meet the EPA's ever-changing regulations. And if you want your new paint finish to be as flawless as it can be, the use of a spray booth is almost mandatory. Of course you can build a make-shift booth using plastic sheeting if you have the space, but the better option is to rent time at a professional facility with good things like air filters, ventilation and lighting. Lastly, you'll need to practice your technique before you actually apply that $300-a-gallon paint on your car.

FINISHES

Nitrocellulose Lacquers
Introduced by DuPont in 1923 or 1924 and used through the mid-1950s, the now-infamous nitrocellulose lacquers were the first automotive paints in colors other than black! They gained great favor due to the ability to apply them quickly with a spray gun, and a good, if brittle, finish was created through repeated coating, hand rubbing, polishing and waxing. Sought after as an original finish, nitrocellulose lacquer is still available in limited quantities from specialty suppliers (see sidebar) and is today used on musical instruments and fine furniture.

Acrylic Lacquer
Acrylic lacquer was developed as a replacement for the nitrocellulose lacquers. Used extensively by GM, it is still available for certain applications. It is both more labor-intensive to apply than acrylic enamels and more forgiving, as many repeated spray coats are needed and mistakes such as runs or drips can be easily corrected; it's a good choice for the inexperienced hobbyist. It can be sanded and polished to a blue ribbon finish and air-dries extremely quickly. It doesn't require anything other than a thinner for spraying; a clear coat can be added for extra protection. This generation of lacquers is still popular for show-quality refinishing; it is possible that they will soon be phased out due to environmental regulations.

Alkyd (synthetic) Enamel
Still in limited use today, alkyd enamels were developed in the 1930s. Like lacquer paint, it cures through solvent evaporation, but develops a gloss without polishing though absorption of atmospheric oxygen. Curing times can be shortened through baking, making it popular for mass production, otherwise it can be somewhat slow to dry, making it difficult for the home hobbyist without a spray booth to achieve a dust-free finish. Synthetic enamels are neither easy nor safe for home use, will dissolve in the presence of solvents and thinners, and are perhaps the least popular finish.

Acrylic Enamel
Acrylic enamel is a harder, more durable version of synthetic enamel first used in the late 1960s. Like synthetic enamel, it dries through solvent evaporation and cures through absorption of atmospheric oxygen, and it was the first paint to incorporate a modern metallic look. While it is solvent-based, it becomes insoluble after curing. It is a relatively fast-drying enamel, dries to a high gloss with relatively high strength and good coverage. It is one of the most affordable paints to buy today and can be top-coated with clear for added protection.

Polyurethane Enamel
Developed for the aviation industry in the mid-1970s and adopted almost universally by the auto industry in the 1980s, polyurethane enamel generally replaced acrylic enamels and is also still widely used. It is a high-durability base and clear coat, with excellent color properties and depth. Once it is prepared for application with a hardener and catalyst, it starts curing and can't be stopped, although its dry time can be sped up or slowed down through the use of specific reducers. As they were developed for a production environment with heat curing, they are difficult to use safely and effectively without professional facilities and safety gear.

Acrylic Urethane Enamel
Sometimes called polyester, this is modern car paint, found on almost all new vehicles. Developed as a durable, chemically resistant paint in compliance with emissions laws, water-based acrylic urethane enamels are the most durable coatings available at this time. The many formulations available offer a wide range of bright colors with good depth and clarity and a high-gloss finish. Reducers are used to reduce the viscosity prior to spraying, and hardeners/activators/catalysts are added to start the chemical bonding process within the paint. Assorted acrylic urethane enamels are the most common way to replicate factory finishes of the last forty years. They are also among the most expensive and poisonous paints on the market.

Clearcoat
Chemically, the clear coat is a sprayable plastic acrylic urethane that was developed to allow the basecoat to do the work of carrying the pigment. It gained widespread acceptance with the emergence of metallic colors from Japan in the 1980s. Applied in layers, it bonds with the color, contributing strength and flexibility, and cures into a hard, glossy shine. Clearcoat prices are usually in the same range as the base coat mixture, and are all catalyzed urethane, which contains isocyanides. For more information on isocyanides, look up the word "cyanide."

Water-borne paints
Because in many cases they've been developed more recently than comparable solvent-borne coatings, water-borne paints in some applications offer better hiding and blending in addition to their environmental and safety benefits. All urethane paints are water-borne, but they still require that the painter take extensive safety precautions in a positive-atmosphere spray booth including a sealed respirator and full-body protective clothing.
source: http://www.hemmings.com/hmn/stories/2005/07/01/hmn_feature7.html
by David Traver Adlphus

http://www.fzrestoration.com

Saturday, March 9, 2013

Vintage & Exotic Auto Restoration - 1955 Ferrari 410 S Berlinetta by Carrozzeria Scaglietti - FZ Restoration Livermore


340 bhp 4,962 cc overhead cam V-12 engine with triple Weber 42 DCF/3 Weber carburetors, five-speed manual rear-mounted transaxle, independent front suspension with coil springs, rear De Dion suspension with trailing arms and transverse leaf springs, and four-wheel drum brakes and tubular steel frame. Wheelbase: 95.3"

• Striking, one-off Scaglietti Berlinetta coachwork

• Specially built for Ferrari SEFAC board member Michel Paul-Cavallier

• Ex-Pierre Bardinon; Mas du Clos Collection for thirty-five years

• Close relative of the 1954 Le Mans-winning 375 Plus

• First appearance of the 4.9-liter Superamerica engine

• Award-winner at the 2009 Concorso d’Eleganza Villa d’Este

• Ferrari Classiche certified and matching numbers

• A unique and very original, important Ferrari

Broad Ferrari histories often give short shrift to some of the marque’s most fascinating early sports racers, many of which occupy truly unique cross-sections of Maranello design and competition history. Such is the case with the 410 Sport, of which only four examples were built in 1955, with the specific intent of winning the notorious Carrera Panamericana road race. Initiated in 1950, in demonstration of Mexico’s recently completed section of the Pan-American Highway, the Carrera quickly gained a reputation for danger, as the rugged terrain left little room for error and resulted in numerous crashes and driver fatalities.

As the final contest in the inaugural season of the Sportscar World Championship, the 1953 Carrera Panamericana was embraced by European manufacturers like Ferrari, who quickly recognized the opportunity to market to American clientele, which the Texas-to-Chiapas race offered. After a dominating defeat by Lancia in 1953, and quite satisfied with its recent one-two-three finish at the 1954 Le Mans with the 375 Plus model, Ferrari declined to enter a factory-sponsored car in the 1954 Carrera. At least two of the winning 375 Plus cars were entered in the Mexican race by private teams, however, the sponsorships were arranged by Luigi Chinetti, and their divergent fates were emblematic of the challenges posed by the Panamericana. While Scuderia racer Umberto Maglioli drove one 375 Plus to victory in the 1954 Carrera, Jack McAfee crashed the actual Le Mans-winning car, which had since been purchased by John Edgar, in an accident that proved to be fatal to co-driver Ford Robinson.

Recognizing that the Carrera’s uneven road surfaces were intrinsically problematic for its sports racer designs to this point, Ferrari sought to devise a car that could specifically neutralize the Panamericana’s more daunting elements. Though the 375 Plus’s Formula One-derived, 60-degree long-block Lampredi V-12 was deemed to be a good starting point for the powertrain, an all-new chassis was required to replace the 375’s high center of gravity and narrow track. The resulting Tipo 519C chassis significantly departed from previous convention, with a shorter wheelbase and a low-profile tubular space-frame of unusual width. Sergio Scaglietti designed and built the coachwork, which provided the first glimpse of the general shape that would soon evolve into his vaunted Testa Rossa.

The bore and stroke of the Lampredi V-12 were increased to displace 4,962 cubic centimeters, resulting in the now revered 4.9-liter Tipo 126 engine that debuted in the Superamerica chassis displayed at the Paris Motor Show in October 1955. For use in the 410 S, the motor was dubbed the Tipo 126C to designate competition use and received an F1-style twin-plug ignition that contributed to developing 380 hp, unprecedented power for a Ferrari sports racer. This ignition configuration helped guarantee even combustion, a factor that was particularly important given the impure fuel that was provided during the Carrera Panamericana’s grueling five-day course.

With such specific intent to win the Mexican road race, it is little surprise that Ferrari designated the 410 S chassis numbers with CM (standing for Carrera Messicana), the four cars being numbered 0592 CM, 0594 CM, 0596 CM, and 0598 CM. Ironically, despite its unique design brief to win the Carrera Panamericana, the 410 S never actually campaigned in the race, as the tragedy of the 1955 Le Mans, as well as the Carrera’s mounting casualty record, led to the race’s prolonged cancellation in 1955.

Interestingly, only two of the four examples of the 410 S were prepared for factory racing, 0596 CM and 0598 CM. These cars were subsequently entered in the 1000 Kilomenters of Buenos Aires in January 1956, where Peter Collins drove one car to the fastest race lap, while the other car was piloted by Juan Manuel Fangio. Both cars were equipped with twin-plug ignition, and despite the promising start, the rear transaxles could not endure the 4.9-liter engine’s raw power, and both cars retired early. Regardless of the competition setback, the Tipo 126 engine sealed its renown a month later with the debut of the first completed Superamerica road car at the Brussels Motor Show of February 1956. 0596 CM and 0598 CM were quickly sold by the factory and went on to great success on the American sports car racing circuit, with one of them being bought by John Edgar and driven by Carroll Shelby.

Conversely, 0592 CM and 0594 CM were imagined as more restrained companions to the factory cars and were equipped with single-plug ignitions that mellowed power output to 345 hp. While 0592 CM received open spyder coachwork similar to the factory racers, 0594 CM was truly unique in that it was clothed with one-off berlinetta coachwork loosely based on the design of Pininfarina’s 375MM competition coupe. Transferring that basic shape onto the 410 S’s lower chassis and wider profile, the Scaglietti body marvelously reinterpreted the classic look with a more pronounced nose. 0592 CM is incredibly rare in this respect, as it is surely one of a small handful of early Ferrari berlinettas entirely designed and built by Scaglietti, as declared by the Scaglietti and Co. badge that adorns the fenders.

While Ferrari’s choice to finish 0594 CM as a closed car may seem odd in light of the 410 Sport model’s competition brief, it makes more sense given the identity of its first owner, Michel Paul-Cavallier. Mr. Paul-Cavallier was an industrialist who served on the board of directors of SEFAC, Ferrari’s corporate umbrella for racing during the 1960s, and his order was likely a reflection of his unique executive position and pride in the Scuderia’s accomplishments. Finished in ivory paint with a blue interior, 0594 CM completed assembly in July 1955 and was shortly thereafter delivered to Mr. Paul-Cavallier himself.

He kept 0594 CM for many years, until 1964, when it was purchased by French racing driver Hugues Hazard, nicknamed “Tutut” by his friends. Tutut was an experienced racing driver who competed in the Tour Auto, the Monte Carlo Rally, and the Coupes des Alpes, as well as numerous hill climbs. It was in 1965 when he entered 0594 CM in the Course de Cote de Belleau, taking to the start with race number 95. After one year, the car was acquired by Parisian resident and well-known Ferrari collector Pierre Bardinon, where it became part of the Mas du Clos Collection, one of the foremost Ferrari collections in the world.

Mr. Bardinon restored the car and retained possession for thirty-five years. During this period of fastidious care, 0594 CM appeared in several magazines and prestigious events, including a depiction in Peter Vann and Antoine Prunet’s 1987 book Fantastiques Ferrari and an appearance at the Chapal leather stand (owned by M. Bardinon’s son) at the 1996 Retromobile in Paris.


Vintage & Exotic Auto Restoration - History of 1930 Bugatti Type 49 - FZ Restoration Livermore


History of 1930 Bugatti Type 49
1930 Bugatti type 49


Houses Bugatti is known for producing the fastest, most exclusive cars in history, one of which 1930 Bugatti Type 49. history records as the iconoclastic founder Ettore Bugatti was born sculptor and architect of the family in Milan. Rather than follow his father’s famous Bugatti brought the family aesthetic to design engines and racing vehicle, which will be the basis of imperfect 1930 Bugatti Type 49.

According to history In 1900, when he was 19, Ettore had built his first car, and went on to work as a designer for a series of European car manufacturers. In 1907, while working for Deutz in Cologne, he built a small car to drive four-cylinder, eight-valve 1208 cc engine and shaft in his basement apartment on his days off. The “Pur Sang” – or Pure Blood – will be a prototype for the Bugatti car is to build when he resigned from Deutz in 1909 to open his own business in an old dye works at Molsheim, in the Alsace region of France.

- See more at: http://autowebs.eu/2011/11/history-of-1930-bugatti-type-49.html#sthash.MPhslkYa.dpuf

Despite his lack of formal training, from the historical record, Bugatti quickly gained a reputation for sophisticated engineering, such as the 1930 Bugatti Type 49. became the first manufacturer to design a race car as a whole concept, rather than treating the chassis and body separately. Only five cars were built in the first year, but by 1911, Bugatti began its domination of Grand Prix racing, winning the first Monaco Grand Prix. Bugatti factory shut down and retreated to Paris to design aircraft engines during the First World War, returned to Mosheim in 1918 with a new passion for racing.

But it’s not all about speed. In 1930, the cities began to experience a new phenomenon – the traffic. Bugatti answer the demand for touring cars that can bust 80 mph on the open road, and a comfortable crawl through the streets of crowded cities. Beginning in 1922 with the Type 30, line 8-cylinder touring Bugatti was crowned by last and arguably its best, Type 49. About 470 built from 1930 to 1934, utilizing a single cam engine last that Bugatti will produce. 1930 3.3 liter straight eight Bugatti Type 49 has three valves and two spark plugs per cylinder and a ton of torque. This tourer, smooth flexible wheel features futuristic, luxurious interior, and is the first Bugatti sports fans in the engine compartment, to avoid the risk of overheating in dense city traffic


Monday, March 4, 2013

Exotic and Historic Car Restorations - 1930 Alfa Romeo 6c 1750 GS - FZ Restoration Livermore


One of the most successful models of its period, the 1750 embodied the functional simplicity typical of the 1930s Italian sports car. But with its supercharged performance and delicately proportioned coachwork, the 1750 could be described as the “ancestor of every GT car ever made”.


Most of the Italian design houses built bodies for the 1750, but Carrozeria Zagato of Milan created the most beautifully proportioned roadsters. The Zagato body appears low and sleek, the impression created by the fact the lightweight aluminium bodywork is positioned quite high on the chassis, entirely above the wheel centres. The Zagato bodies were designed so that they would be seen in their best light when viewed by a person standing. While the P2 Grand Prix car put Alfa Romeo on the map, the 1500 and 1750, built shortly thereafter, made Alfa Romeo a serious contender in the sports car market. These were agile cars, built around a light frame and small, high-revving engine. This concept was borrowed from P2, making the 1750 one of the first sports cars to directly benefit from Grand Prix engineering.


The person responsible for the 1750 and Alfa Romeo’s post war success was engineer Vittorio Jano. He was persuaded to leave Fiat by Nicola Romeo and immediately went on to design the highly successful P2 and 1500. After the instant success of P2 and a victory at the 1928 Mille Miglia with a supercharged 1500, Vittorio Jano had the bold idea of using a supercharger in the 1750, Alfa’s next high-revving sports car.


With its supercharger, the 1750 Gran Sport was an invincible race car, one with ample torque for its small chassis. The supercharger was a necessary ingredient that allowed the 1750 to be light, yet powerful, a characteristic that contributed to less driver fatigue and less stress on individual components.


At the 1929 Mille Miglia, Vittorio Jano squashed any doubts about supercharging when twenty-five out of twenty-six 1750s completed the 1000 mile Mille Miglia. Next year, the 1750 would become known for an epic duel between Nuvolari and Varzi in the gruelling Mille Miglia race. Nuvolari overtook Varzi in the dark with his 1750’s headlights switched off and continued to win the race. Other victories included the 1929 and 1930 24 Hours of Spa, 1930 Tourist Trophy and numerous other road races and hill climbs.


The 1750 was produced in six series and became more sophisticated from 1929 to 1933. In total, about 2500 cars were completed and they became the quintessential model for both the amateur and professional drivers. Available in several configurations, most cars were sold as rolling chassis and bodied by coachbuilders such as Zagato and James Young.


The definitive form of the 1750 was the Gran Sport or Super Sport. These were the supercharged versions used by the factory and many had unique specification to cope with a variety of motor sport events. In total 360 of these cars were made and they provided launch points for several firms, including Zagato who bodied most of them, and Scuderia Ferrari, who bought and raced them.
source: http://www.autorestorations.co.nz/automotive-dreams/1930-alfa-romeo-6c-1750-gs